I found these cute little pumpkin pie candles in the dollar bin at the craft store. This is the pie box I created to hold them. I changed out the ribbon they had with some pumpking pie ribbon. They had other "flavors" as well. Can't wait to make more!
Instructions:
For the box insert that holds the Pie:
I used a 5x5 piece of CS and scored all 4 sides at 1/2 inch.
I then cut out the square of each corner.
Last, I used the 2.5" circle punch to create a spot for the pie to sit.
For the box:
I started with a 7x11 piece of CS.
Holding the paper vertical, score 1.5" from the left and the right.
Holding the paper horizontal, score at 1.5", 5.5", and 7". Cut in on the side pieces as shown below.
Here is the template.
Hope that helps. If you have any questions, just let me know!
Wednesday, September 22, 2010
Monday, September 20, 2010
Halloween Decor Elements
I added the Halloween Decor Elements to create a display piece for Halloween. This was a very simple project that took less than 15 minutes to create.
Monday, September 13, 2010
Open House
I had an open house yesterday that was so much fun. We did two make n take projects and I had tons of samples on display. Thanks to everyone who came. It was wonderful meeting everyone. I also had a door prize, and the winner is.....Deb Geist! Congratulations and I hope to see everyone again soon!
Friday, September 10, 2010
Golf - On the Green
Below is a picture of a golf gift that I created.
I filled the test tube with golf tees and made a holder on each side for a golf ball.
Products Used:
On the Green Stamp
Always Artichoke Ink
CS - Whisper White, Always Artichoke, Bravo Burgundy, and Sahara Sand
Punches - 1 3/8 circle, 3/4 circle
Whisper White 3/8 Taffeta ribbon
Perfect Polka Dots embossing folder
Score 1" from top and 1" from bottom
Starting at the right, score at the following: 1", 3", 4", 6".
I then cut out the 5x1" sections for the top part.
I cut a slit in folds on the sides to fold them in.
So you end up with the holder dimensions being 1" tall, 2" deep, and 6.5" wide. And then the back being 5" tall
The burgundy strip on the front is 3/4x 6.5.
The sahara sand back mat is 3.5 x 6
The mats on the stamped pieces are 2x2.75
The burgundy strip in the background is 6.5x.75.
And then the stamped images I just eyeballed.
The idea of the holder came from the blog below and I just modified it to be large and to have a back.
http://www.paperpunchaddiction.com/2009/10/treat-tube-gift-box.html
I filled the test tube with golf tees and made a holder on each side for a golf ball.
Products Used:
On the Green Stamp
Always Artichoke Ink
CS - Whisper White, Always Artichoke, Bravo Burgundy, and Sahara Sand
Punches - 1 3/8 circle, 3/4 circle
Whisper White 3/8 Taffeta ribbon
Perfect Polka Dots embossing folder
Below are the basic measurements that I used. If you have further questions, ask away! I am not the best at writing up instructions.
If you are holding the sheet horizontal, do the following:
Score 1" from top and 1" from bottom
Starting at the right, score at the following: 1", 3", 4", 6".
I then cut out the 5x1" sections for the top part.
I cut a slit in folds on the sides to fold them in.
So you end up with the holder dimensions being 1" tall, 2" deep, and 6.5" wide. And then the back being 5" tall
The burgundy strip on the front is 3/4x 6.5.
The sahara sand back mat is 3.5 x 6
The mats on the stamped pieces are 2x2.75
The burgundy strip in the background is 6.5x.75.
And then the stamped images I just eyeballed.
The idea of the holder came from the blog below and I just modified it to be large and to have a back.
http://www.paperpunchaddiction.com/2009/10/treat-tube-gift-box.html
Thursday, September 9, 2010
Christmas DVD Case
I have lots of Christmas shares for today. While experimenting with the bird punch this is the other item I created a while back. It is a clear dvd case I decorated and created a wreath with the wing.
Christmas Poinsettia Cards
I was experimenting with the bird punch and made two poinsettia cards with the wing. They are both done in Cherry Cobbler. It is amazing how the accent colors have such an impact on the deepness of the red.
Tuesday, September 7, 2010
Decor Elements
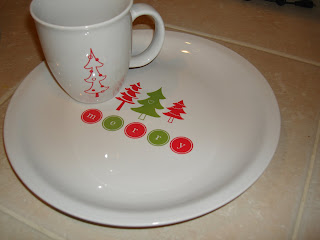
At convention they showed some very cute ideas of making inexpensive gifts for the holiday season. You could add a bag of candy to the mug and fill the plates with holiday baked goods. I purchased the plates for under a $1 and simply added the decor elements.
Subscribe to:
Posts (Atom)


